
There is an easy way to get through this quest goal, however collecting the right monsters to do so can take time. (Ideally, if beginners read this post early, they can start collecting these monsters so that they are ready when they come across the War Hog).
What is the War Hog?
The War Hog is a boss that you will need to defeat towards the end of the story line quest in Mt Magma. It's a fire monster that does significant damage to your team and can be difficult to defeat.
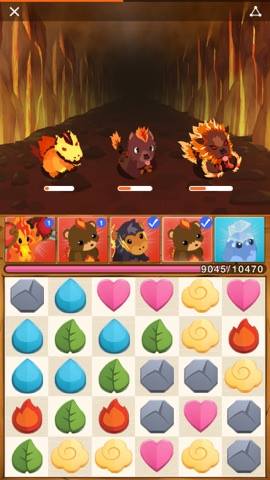
Within the battle against the War Hog, you will face five waves of monsters. The first, second and fourth wave will contain 3 fire monsters. The third wave consists of a fire, rock and leaf monster. The fifth wave is against the War Hog himself. He's a fire monster with high health and attack and this is where many players are quickly defeated.

Wave 1

Wave 2

Wave 3

Wave 4

Wave 5 - War Hog
How do I battle the War Hog?


Without a brainfreeze in your team, you'll see the above right message when you click on the War Hog. Once you add a brainfreeze to your team (lower left screenshot), and you'll be able to battle the War Hog (lower right screenshot).


Battling against the War Hog it will cost you 5 energy. Battle Camp recommends that your power rating is at least 163k in order to defeat him, but most players have a significantly lower power rating than this when they reach this point in the game. (If you're curious about ideas for raising your power rating, try reading through this post). However, the method of playing against the War Hog detailed in this post, means that you can defeat him with a power rating as low as 41k (as per the team I used in the above left screenshot).
What monsters should I have on my team?
As detailed above, one monster that you must have on your team is a brainfreeze. So that this isn't a significant weakness, try to feed the brainfreeze up to the maximum level so that its health and attack are as good as they can be. If you are playing with a zodiac matched team, you may want to find a brainfreeze in your zodiac. (The brainfreeze does not have a passive ability so this isn't essential, but it will give you the flexibility to have one different monster in your team that isn't your zodiac). Brainfreezes will drop at random while you are battling commons around the game. They can be won from monster grabs or more expensive spins. (I wouldn't recommend spending gold to find a special though!)

Usually when you'll be coming up against a fire boss in the game, you will be wanting to use as many water monsters as possible to take advantage of its 30% element advantage against fire. This is still a good idea, however the method detailed here will require you to find some specific fire monsters to use instead.
To easily beat the War Hog, you will need to either have 3 monsters with fire pound on your team, or 1 monster with fire crush. Both options will allow you to keep the War Hog stunned every turn so that he cannot attack you.
Unfortunately, the only way to get a fire crush in the game is through a reward prize from an event (or trading with someone who has one). Fire crush will stun one fire monster for three turns, and successively activates again after those three turns. It's quick and easy and placing this monster on your team is all you need to do.

Example monster with Fire Crush
The alternative method of 3 monsters with fire pound is usually easier to obtain, but harder to use. Fire pound will stun all fire monsters for one turn, and successively activates every three turns thereafter. By using three fire pounds on your team, and the method described later in this post, you can set the fire pounds up so that you will have a fire pound activating every turn to keep the War Hog stunned and unable to attack you.


Both Killavolts and Smokeybears have fire pound
If you are choosing this method, the two types of rare monsters with fire pound that you need to collect are Smokeybears and Killavolts. Smokeybear pieces can be farmed in Turtle Falls. Killavolt pieces can be found in TeePee Hollow. Killavolts only require 2 rare pieces compared to 4 pieces for Smokeybears, and is often easier to collect.


Also be sure to play against the daily boss in camp for a chance that one of these monsters might drop as the rare monster from the mystery egg that you'll win.

Completing this boss in camp each day will earn you a random rare monster.
Ideally your battle with the War Hog will be over faster if you are able to feed these fire pound monsters up to their maximum level, and they'll become stronger still if you can match the same zodiac of at least 4 of your monsters on your team. If you can find these monsters with passives that increase their attack (like rogue/lethal/cavalry), they'll become stronger still.
Killavolt/Smokeybear Method
To show you that this method works regardless of the level and zodiac (and because I was too impatient to get this blog post up quickly), in this example my fire pound monsters are at levels 1 and 2, and my brainfreeze is at level 1. None of my monsters are zodiac matched. The team I've used has a power rating of 41k (see screenshot below) and was successful against the War Hog.

The team that I've used in this example. (Power rating 41k)
Begin your battle against the War Hog. Look at the little blue circles containing numbers in the top right corner of your monsters avatars. You can see that at the beginning of this battle, the number shown for my smokeybears and killavolts is 3. This is how many turns I need to make before they will be ready to activate their first pound. (This is also called the "initial cooldown").

The blue circles show that it will take 3 turns for my smokeybears and killavolts to have their pound ready to activate.
Click on your smokeybears and killavolts and you will see a pop up screen appear like in the screenshot below. This screen details a lot of information about each monster. The number of turns until the pound is ready to activate is now shown in red font. The important thing to do is to turn Auto-Cast to "OFF". this will stop the pound from activating as soon as it is ready to. Repeat for your other two monsters with fire pound.


Turn Auto-Cast to Off on your three monsters with Pound
Make your first three turns. Try matching 5 gems where possible to attack all monsters at the same time. After those three turns, you'll notice that instead of seeing a number of cooldown turns in the blue circles, you'll now see a tick to indicate that the active is ready. If you have correctly turned Auto-Cast off, you will also see a pulsing white border around your pound monsters (see the screenshot below).

Pound is ready to activate on my Smokeybears and Killavolt
The aim of this method is to space those three pounds out onto different turns. If they all activated at once, all the fire monsters will be stunned for only one turn. If we can space them out so that one is activated each turn, we can keep them stunned indefinitely. If you have the patience, you can simply manually activate one of your pounds every turn by double clicking on one that is ready, or opening the information screen and clicking the "activate" button. The method described from here turns auto-cast back on so that the activation happens automatically at the right turns for you. (A special thank you to Craig W. for recently reminding me that players can easily use autocast to facilitate activating the pound every turn).
Choose one of your pound monsters to activate first. I've chosen the smokeybear on the left. Click on that monster to see its information screen again. There is no longer a cooldown as the monster is ready to activate its pound, and the "close" button has now turned into an "activate" button. Set Auto-Cast back to "ON", so that this pound will automatically activate every three turns from now on. Then click the "Activate" button and watch all three monsters be stunned. An alternative method to activating is to double click your monster when the white pulsing border appears.


Smokeybear on the left has activated and stunned the fire monsters.
Match gems for your next move. Then repeat the steps above to activate your next pound monster and set its Auto-Cast back to "ON".

Activate your second pound and turn its Auto-Cast back on

Repeat the steps above to activate your last monster's pound. In the screenshot below, the white lightning bolt above the enemy monsters indicates that the stun will last 1 turn. The picture of the monster with a lightning bolt also indicates that the monsters are stunned.

Pound in action
If all goes well, this is all you will need to do for this method. All fire monsters will be stunned every turn automatically for you. The only monsters that will be able to attack you are the rock and leaf monsters in the third wave.
Important Note: There is one exception here. If you happen to defeat a wave through gem matching, and not your active doing the final damage, the cooldown of your monsters will be affected. Keep an eye out on the cooldown numbers so that you always have one pound ready to activate, one pound with a 1 turn cooldown and one pound with a 2 turns cooldown. An example of muddled cooldowns is shown in the screenshot below, where two pounds are now ready to activate. To fix this, turn the auto-cast off on one of the pound monsters that is ready to activate. Wait until you reach a turn when the other two pounds won't be activated, then activate the ready pound and turn auto-cast back on. Some players choose to wait until the 4th or 5th wave before setting the auto-cast pound ordering to reduce the chances of this happening.
Two smokeybears are unfortunately ready to activate at the same time.
I'll need to space them out correctly again.


In the screenshots above, my auto-cast cooldown ordering is correct once more and the War Hog will be stunned every turn. As you can see in the above right screenshot, the War Hog has almost been defeated and my team is remaining at maximum health as it can't ever hit me. Success with a 41k team!
As an alternative method to using auto-cast to automate the process, you can go through the battle simply double clicking a ready pound every turn. This can become tedious and can lead to high damage if you forget.
Crush Method


As long as you can survive up to 3 turns against the War Hog, you don't need to turn Auto-Cast off. To make it so that the War Hog can not ever hit your team, turn Auto-Cast off during wave 4 and make as many turns as you need to have it ready to activate. When the War Hog appears, activate your crush and turn auto-cast back on. The War Hog will then be stunned until you defeat him.
After Success
After you have defeated the War Hog, you will receive 50 XP from the 5 energy you used, plus an additional 100 XP and 100 Stones for completing the story line quest goal.


Following this there will be a few minor quests around Mt Magma before you can defeat Inferno Hall and then move onto the Lost Temple map area.
No comments:
Post a Comment